
If a system is popular with users, you can bet it’s just as popular with cybercriminals. Although Windows still dominates, second place belongs to macOS. And this makes it a viable target for attackers.
With various built-in protection mechanisms, macOS generally provides a pretty much end-to-end security for the end user. This post looks at how some of them work, with examples of common attack vectors and ways of detecting and thwarting them.
Overview of macOS security mechanisms
Let’s start by outlining the set of security mechanisms in macOS with a brief description of each:
- Keychain – default password manager
- TCC – application access control
- SIP – ensures the integrity of information in directories and processes vulnerable to attacks
- File Quarantine – protection against launching suspicious files downloaded from the internet
- Gatekeeper – ensures only trusted applications are allowed to run
- XProtect – signature-based anti-malware protection in macOS
- XProtect Remediator – tool for automatic response to threats detected by XProtect
Keychain
Introduced back in 1999, the password manager for macOS remains a key component in the Apple security framework. It provides centralized and secure storage of all kinds of secrets: from certificates and encryption keys to passwords and credentials. All user accounts and passwords are stored in Keychain by default. Access to the data is protected by a master password.
Keychain files are located in the directories ~/Library/Keychains/, /Library/Keychains/ and /Network/Library/Keychains/. Besides the master password, each of them can be protected with its own key. By default, only owners of the corresponding Keychain copy and administrators have access to these files. In addition, the files are encrypted using the reliable AES-256-GCM algorithm. This guarantees a high level of protection, even in the event of physical access to the system.
However, attacks on the macOS password manager still occur. There are specialized utilities, such as Chainbreaker, designed to extract data from Keychain files. With access to the file itself and its password, Chainbreaker allows an attacker to do a local analysis and full data decryption without being tied to the victim’s device. What’s more, native macOS tools such as the Keychain Access GUI application or the /usr/bin/security command-line utility can be used for malicious purposes if the system is already compromised.
So while the Keychain architecture provides robust protection, it is still vital to control local access, protect the master password, and minimize the risk of data leakage outside the system. Below is an example of a Chainbreaker command:
python -m chainbreaker -pa test_keychain.keychain -o output
As mentioned above, the security utility can be used for command line management, specifically the following commands:
security list-keychains– displays all available Keychain files
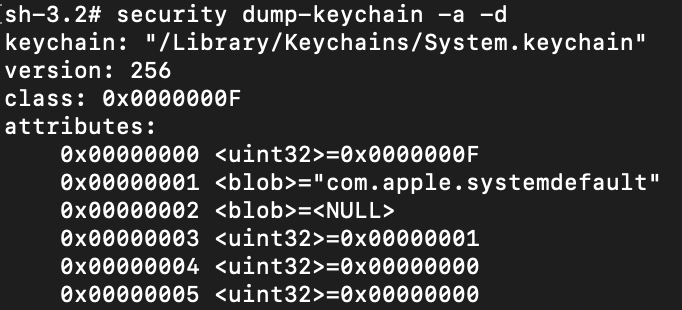
security dump-keychain -a -d– dumps all Keychain files
security dump-keychain ~/Library/Keychains/login.keychain-db– dumps a specific Keychain file (a user file is shown as an example)
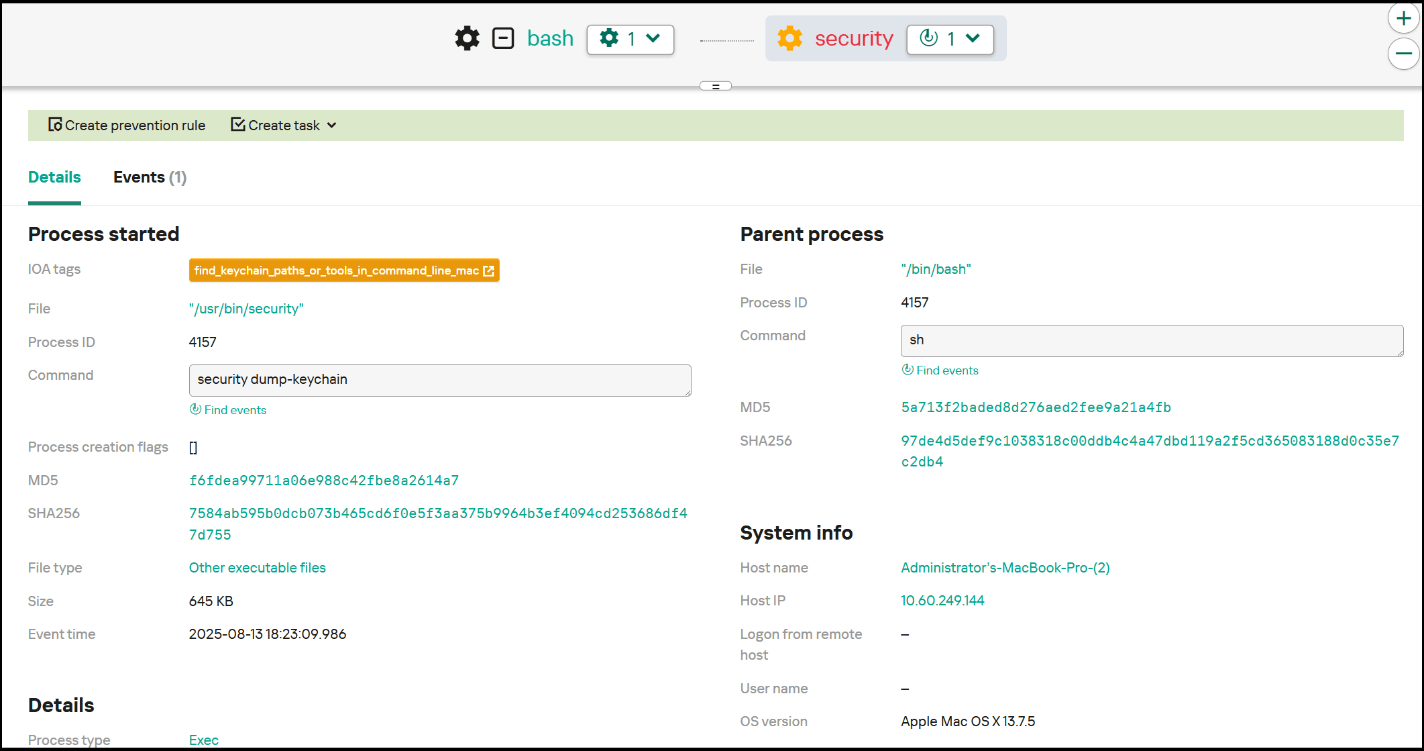
To detect attacks of this type, you need to configure logging of process startup events. The best way to do this is with the built-in macOS logging tool, ESF. This allows you to collect necessary events for building detection logic. Collection of necessary events using this mechanism is already implemented and configured in Kaspersky Endpoint Detection and Response (KEDR).
Among the events necessary for detecting the described activity are those containing the security dump-keychain and security list-keychains commands, since such activity is not regular for ordinary macOS users. Below is an example of an EDR triggering on a Keychain dump event, as well as an example of a detection rule.
Sigma:
|
1 2 3 4 5 6 7 8 9 10 11 12 13 14 15 16 17 18 |
title: Keychain access description: This rule detects dumping of keychain tags: - attack.credential-access - attack.t1555.001 logsource: category: process_creation product: macos detection: selection: cmdline: security cmdline: -list-keychains -dump-keychain condition: selection falsepositives: - Unknow level: medium |
SIP
System Integrity Protection (SIP) is one of the most important macOS security mechanisms, which is designed to prevent unauthorized interference in critical system files and processes, even by users with administrative rights. First introduced in OS X 10.11 El Capitan, SIP marked a significant step toward strengthening security by limiting the ability to modify system components, safeguarding against potential malicious influence.
The mechanism protects files and directories by assigning special attributes that block content modification for everyone except trusted system processes, which are inaccessible to users and third-party software. In particular, this makes it difficult to inject malicious components into these files. The following directories are SIP-protected by default:
/System/sbin/bin/usr(except/usr/local)/Applications(preinstalled applications)/Library/Application Support/com.apple.TCC
A full list of protected directories is in the configuration file /System/Library/Sandbox/rootless.conf. These are primarily system files and preinstalled applications, but SIP allows adding extra paths.
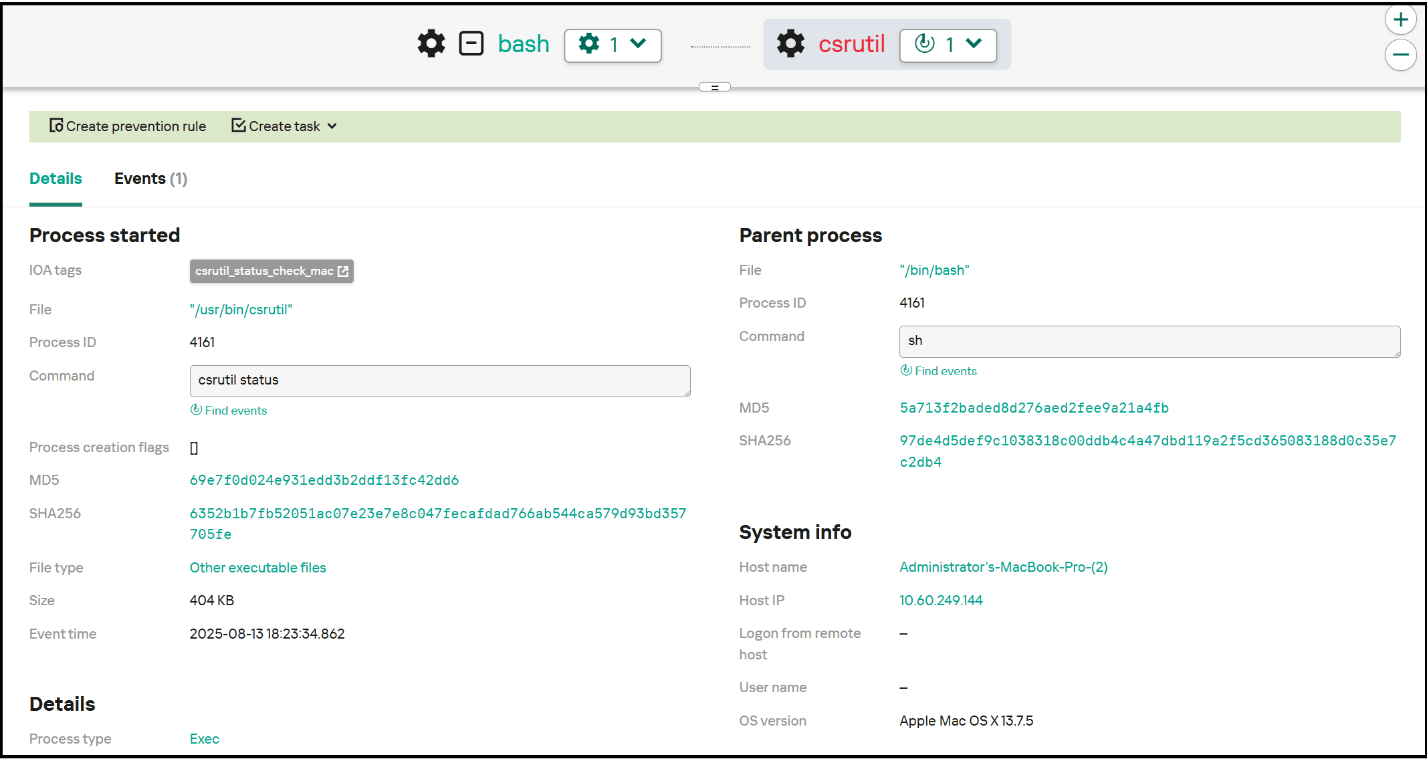
SIP provides a high level of protection for system components, but if there is physical access to the system or administrator rights are compromised, SIP can be disabled – but only by restarting the system in Recovery Mode and then running the csrutil disable command in the terminal. To check the current status of SIP, use the csrutil status command.
To detect this activity, you need to monitor the csrutil status command. Attackers often check the SIP status to find available options. Because they deploy csrutil disable in Recovery Mode before any monitoring solutions are loaded, this command is not logged and so there is no point in tracking its execution. Instead, you can set up SIP status monitoring, and if the status changes, send a security alert.
Sigma:
|
1 2 3 4 5 6 7 8 9 10 11 12 13 14 15 |
title: SIP status discovery description: This rule detects SIP status discovery tags: - attack.discovery - attack.t1518.001 logsource: category: process_creation product: macos detection: selection: cmdline: csrutil status condition: selection falsepositives: - Unknow level: low |
TCC
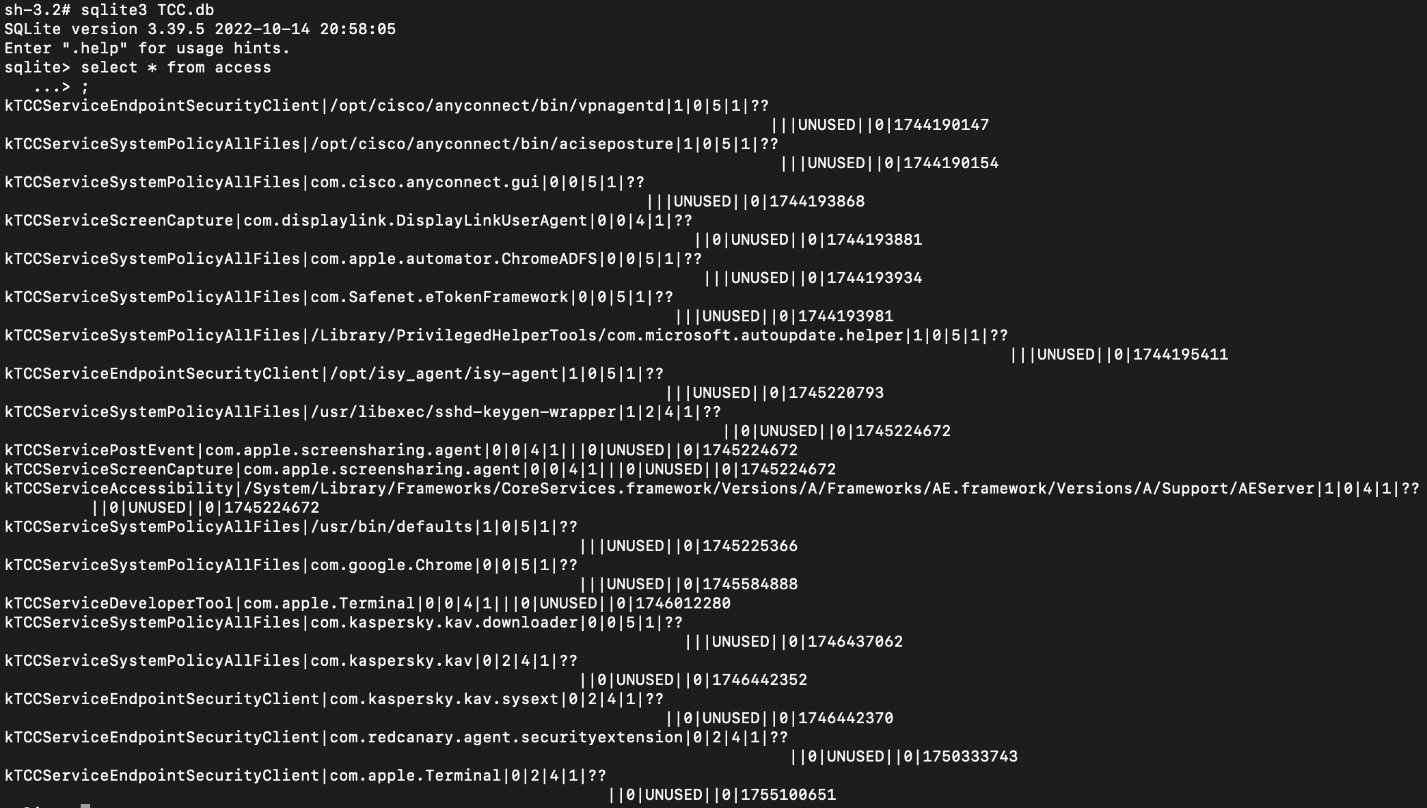
macOS includes the Transparency, Consent and Control (TCC) framework, which ensures transparency of applications by requiring explicit user consent to access sensitive data and system functions. TCC is structured on SQLite databases (TCC.db), located both in shared directories (/Library/Application Support/com.apple.TCC/TCC.db) and in individual user directories (/Users/<username>/Library/Application Support/com.apple.TCC/TCC.db).
The integrity of these databases and protection against unauthorized access are implemented using SIP, making it impossible to modify them directly. To interfere with these databases, an attacker must either disable SIP or gain access to a trusted system process. This renders TCC highly resistant to interference and manipulation.
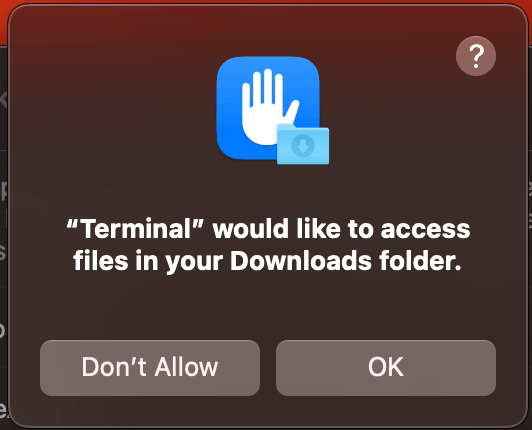
TCC works as follows: whenever an application accesses a sensitive function (camera, microphone, geolocation, Full Disk Access, input control, etc.) for the first time, an interactive window appears with a request for user confirmation. This allows the user to control the extension of privileges.
A potential vector for bypassing this mechanism is TCC Clickjacking – a technique that superimposes a visually altered window on top of the permissions request window, hiding the true nature of the request. The unsuspecting user clicks the button and grants permissions to malware. Although this technique does not exploit TCC itself, it gives attackers access to sensitive system functions, regardless of the level of protection.
Attackers are interested in obtaining Full Disk Access or Accessibility rights, as these permissions grant virtually unlimited access to the system. Therefore, monitoring changes to TCC.db and managing sensitive privileges remain vital tasks for ensuring comprehensive macOS security.
File Quarantine
File Quarantine is a built-in macOS security feature, first introduced in OS X 10.5 Tiger. It improves system security when handling files downloaded from external sources. This mechanism is analogous to the Mark-of-the-Web feature in Windows to warn users of potential danger before running a downloaded file.
Files downloaded through a browser or other application that works with File Quarantine are assigned a special attribute (com.apple.quarantine). When running such a file for the first time, if it has a valid signature and does not arouse any suspicion of Gatekeeper (see below), the user is prompted to confirm the action. This helps prevent running malware by accident.
To get detailed information about the com.apple.quarantine attribute, use the xattr -p com.apple.quarantine <File name> command. The screenshot below shows an example of the output of this command:
0083– flag for further Gatekeeper actions689cb865– timestamp in hexadecimal format (Mac Absolute Time)Safari– browser used to download the file66EA7FA5-1F9E-4779-A5B5-9CCA2A4A98F5– UUID attached to this file. This is needed to database a record of the file
The information returned by this command is stored in a database located at ~/Library/Preferences/com.apple.LaunchServices.QuarantineEventsV2, where it can be audited.
To avoid having their files quarantined, attackers use various techniques to bypass File Quarantine. For example, files downloaded via curl, wget or other low-level tools that are not integrated with File Quarantine are not flagged with the quarantine attribute.
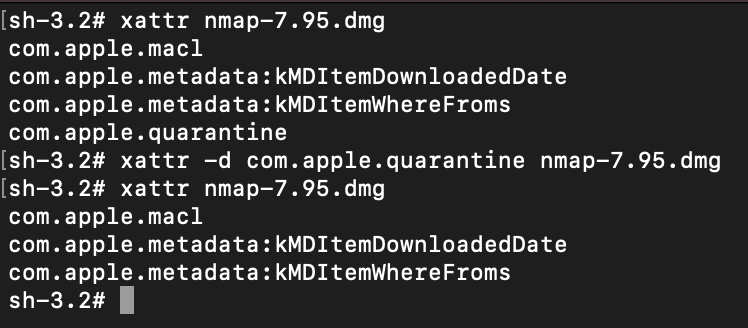
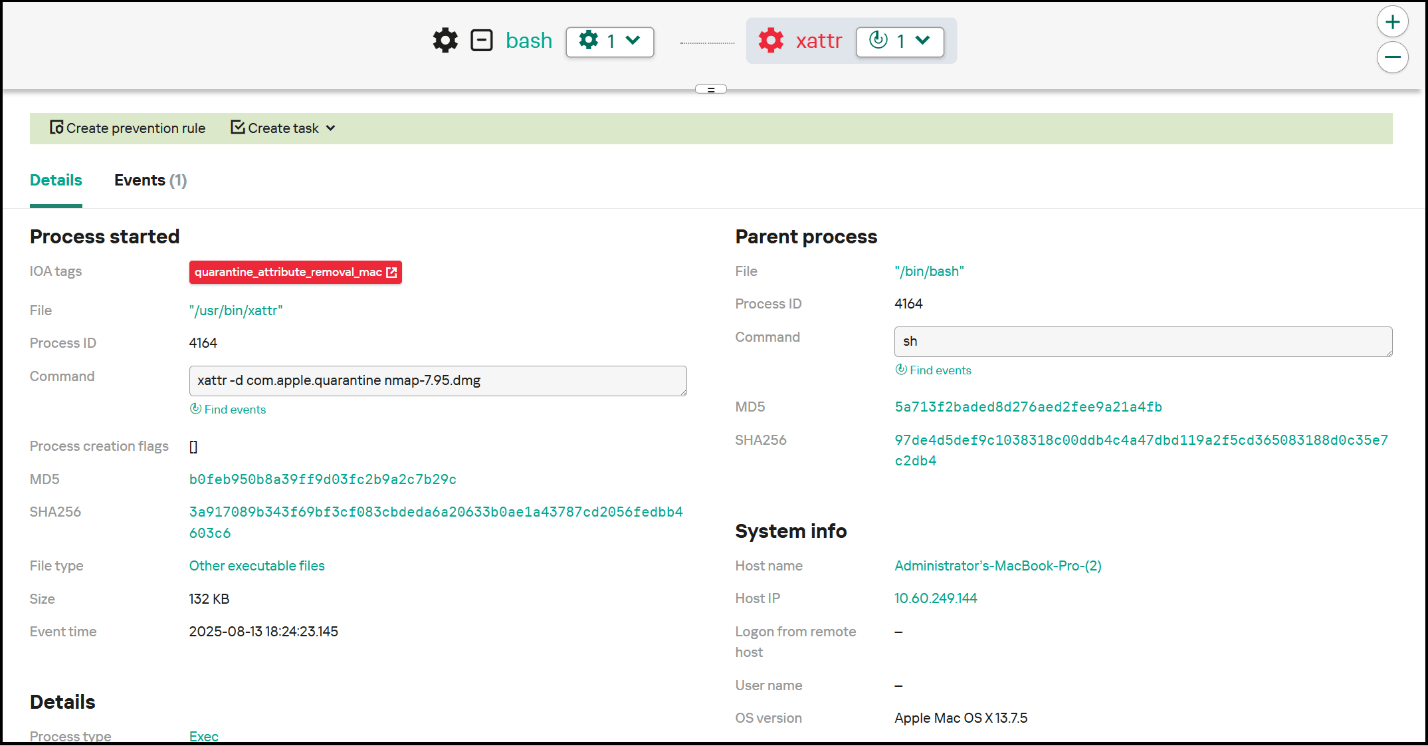
It is also possible to remove the attribute manually using the xattr -d com.apple.quarantine <filename> command.
If the quarantine attribute is successfully removed, no warning will be displayed when the file is run, which is useful in social engineering attacks or in cases where the attacker prefers to execute malware without the user’s knowledge.
To detect this activity, you need to monitor execution of the xattr command in conjunction with -d and com.apple.quarantine, which implies removal of the quarantine attribute. In an incident related to macOS compromise, also worth investigating is the origin of the file: if it got onto the host without being flagged by quarantine, this is an additional risk factor. Below is an example of an EDR triggering on a quarantine attribute removal event, as well as an example of a rule for detecting such events.
Sigma:
|
1 2 3 4 5 6 7 8 9 10 11 12 13 14 15 |
title: Quarantine attribute removal description: This rule detects removal of the Quarantine attribute, that leads to avoid File Quarantine tags: - attack.defense-evasion - attack.t1553.001 logsource: category: process_creation product: macos detection: selection: cmdline: xattr -d com.apple.quarantine condition: selection falsepositives: - Unknow level: high |
Gatekeeper
Gatekeeper is a key part of the macOS security system, designed to protect users from running potentially dangerous applications. First introduced in OS X Leopard (2012), Gatekeeper checks the digital signature of applications and, if the quarantine attribute (com.apple.quarantine) is present, restricts the launch of programs unsigned and unapproved by the user, thus reducing the risk of malicious code execution.
The spctl utility is used to manage Gatekeeper. Below is an example of calling spctl to check the validity of a signature and whether it is verified by Apple:
Spctl -a -t exec -vvvv <path to file>
Gatekeeper requires an application to be:
- either signed with a valid Apple developer certificate,
- or certified by Apple after source code verification.
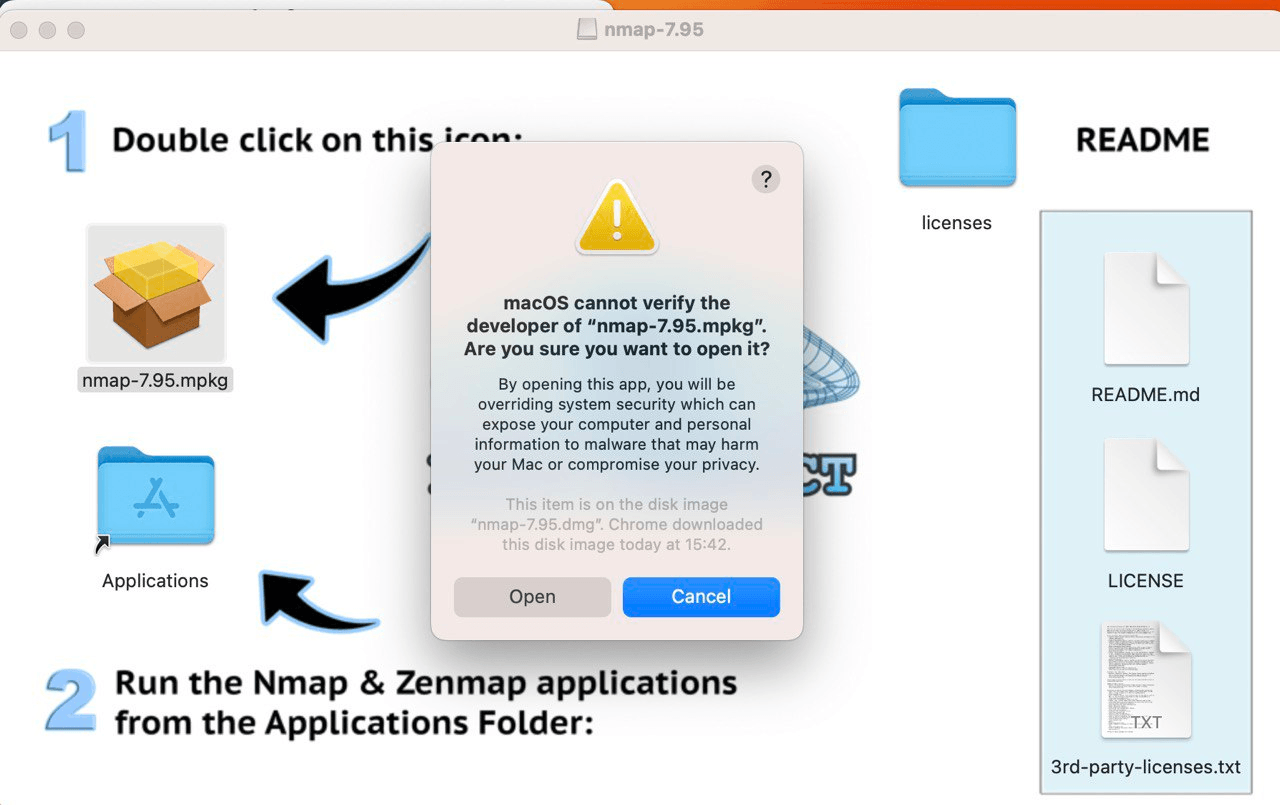
If the application fails to meet these requirements, Gatekeeper by default blocks attempts to run it with a double-click. Unblocking is possible, but this requires the user to navigate through the settings. So, to carry out a successful attack, the threat actor has to not only persuade the victim to mark the application as trusted, but also explain to them how to do this. The convoluted procedure to run the software looks suspicious in itself. However, if the launch is done from the context menu (right-click → Open), the user sees a pop-up window allowing them to bypass the block with a single click by confirming their intention to use the application. This quirk is used in social engineering attacks: malware can be accompanied by instructions prompting the user to run the file from the context menu.
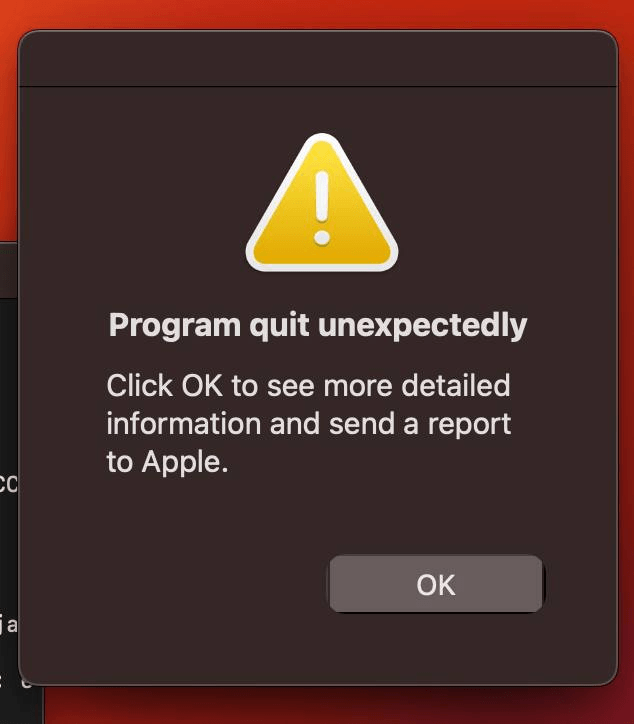
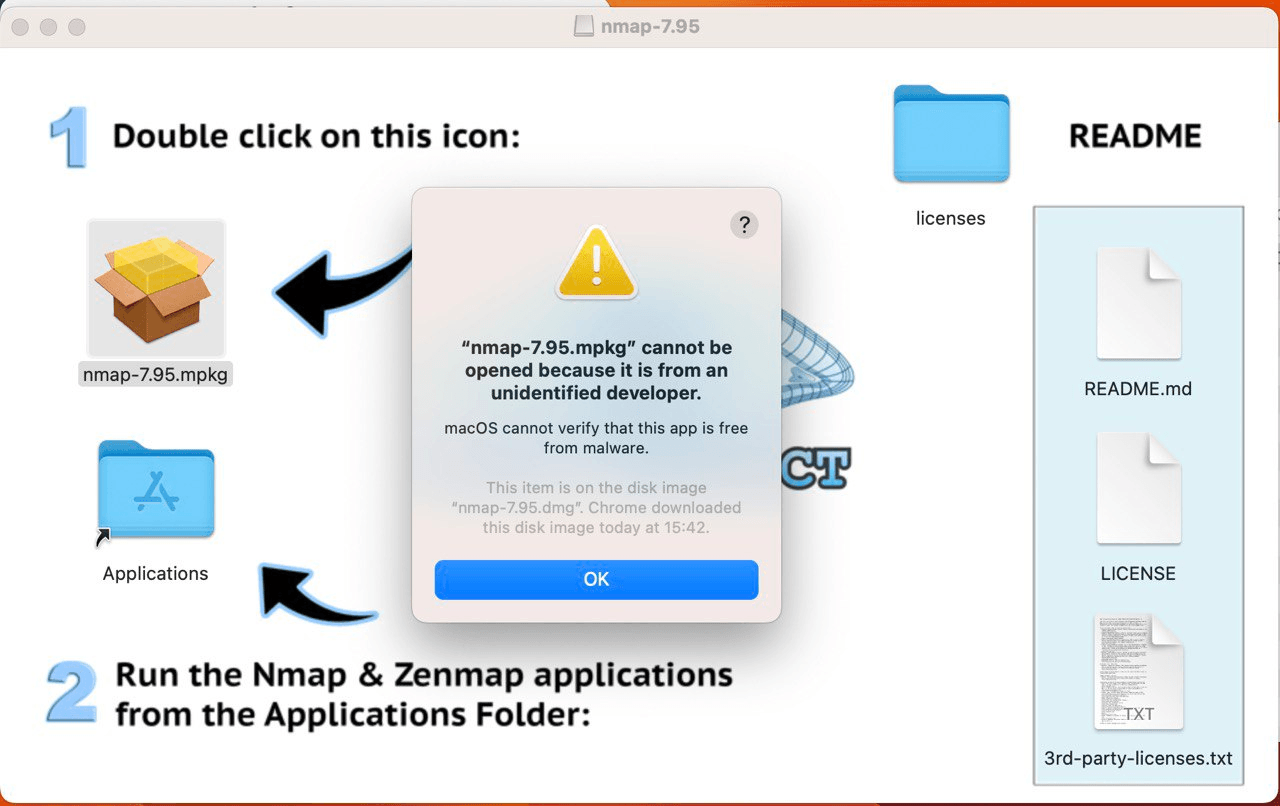
Let’s take a look at the method for running programs from the context menu, rather than double-clicking. If we double-click the icon of a program with the quarantine attribute, we get the following window.
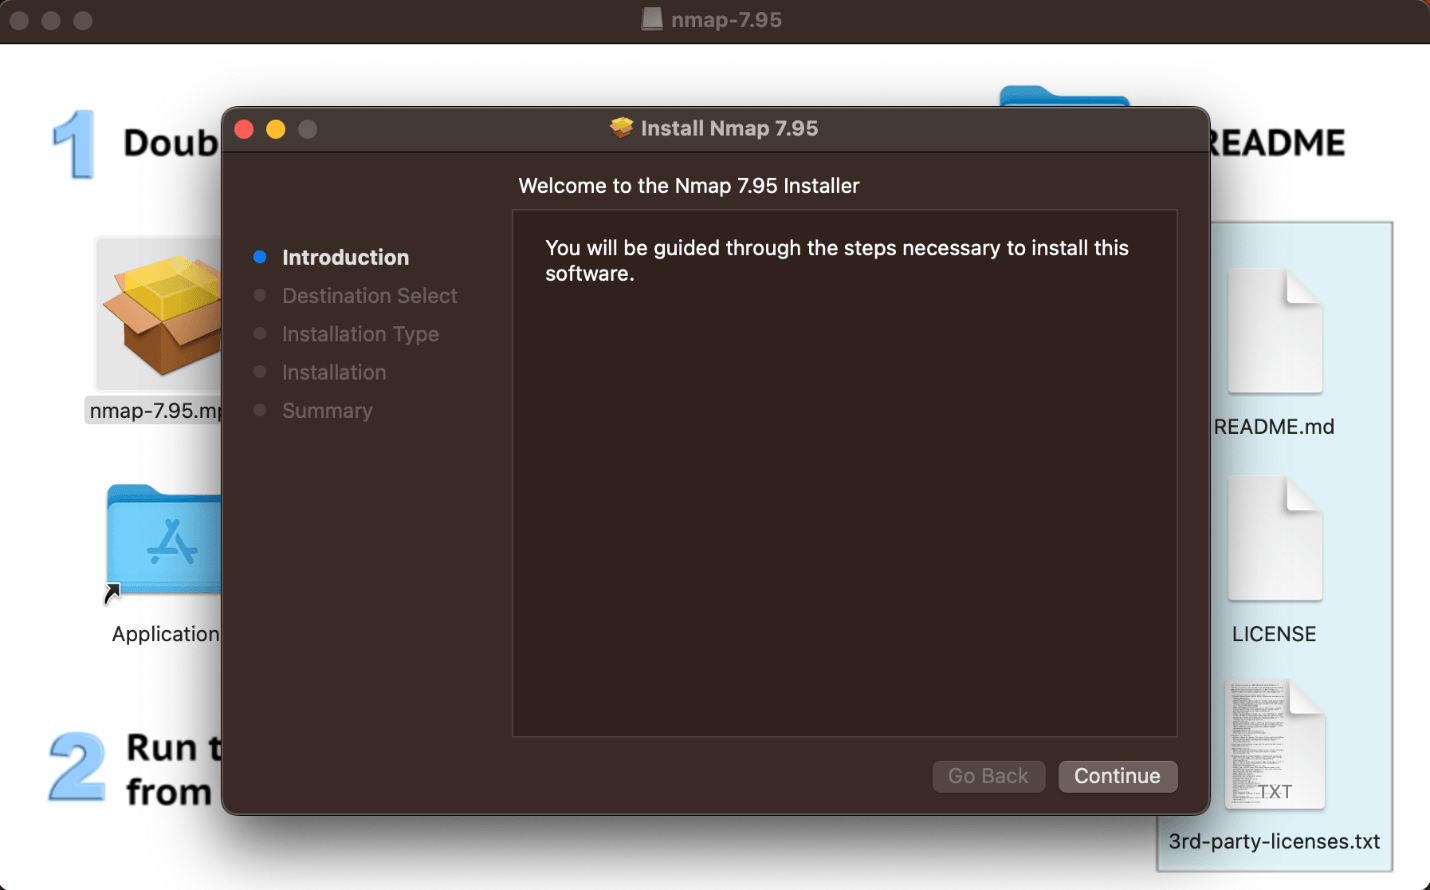
If we run the program from the context menu (right-click → Open), we see the following.
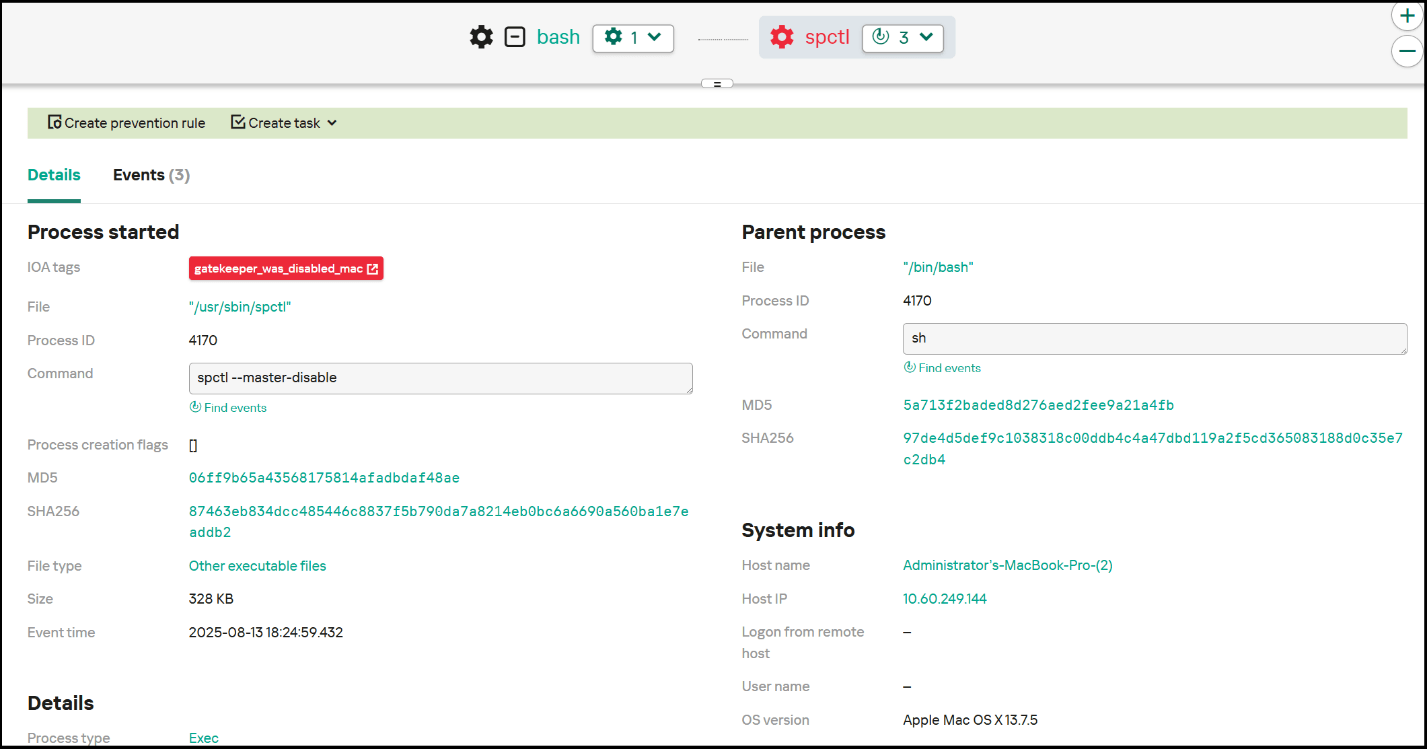
Attackers with local access and administrator rights can disable Gatekeeper using the spctl –master disable or --global-disable command.
To detect this activity, you need to monitor execution of the spctl command with parameters –master disable or --global-disable, which disables Gatekeeper. Below is an example of an EDR triggering on a Gatekeeper disable event, as well as an example of a detection rule.
Sigma:
|
1 2 3 4 5 6 7 8 9 10 11 12 13 14 15 |
title: Gatekeeper disable description: This rule detects disabling of Gatekeeper tags: - attack.defense-evasion - attack.t1562.001 logsource: category: process_creation product: macos detection: selection: cmdline: spctl cmdline: - '--master-disable' - '--global-disable' condition: selection |
Takeaways
The built-in macOS protection mechanisms are highly resilient and provide excellent security. That said, as with any mature operating system, attackers continue to adapt and search for ways to bypass even the most reliable protective barriers. In some cases when standard mechanisms are bypassed, it may be difficult to implement additional security measures and stop the attack. Therefore, for total protection against cyberthreats, use advanced solutions from third-party vendors. Our Kaspersky EDR Expert and Kaspersky Endpoint Security detect and block all the threats described in this post. In addition, to guard against bypassing of standard security measures, use the Sigma rules we have provided.









How attackers adapt to built-in macOS protection